3D Printing - 3D Modeling
This is a short introduction to 3D modeling, we are going to use a freeware program, the Openscad. It can be downloaded here This is a basic introduction to some of openscad's functions that allow us to start 3D modeling.
Mouse Commands
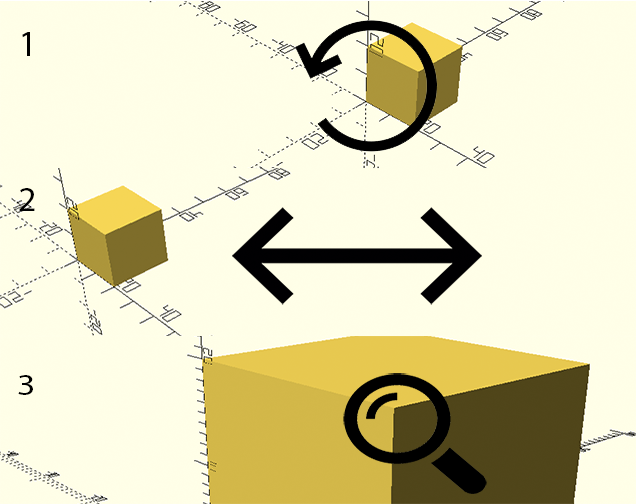
1 Rotate the axis system:
Press and hold down the left mouse key and move the mouse in any direction.
2 Move the plane Press and hold down the left mouse key and move the mouse in any direction.
3 Zoom Rotate the mouse wheel in order to zoom in or zoom out.
2 Move the plane Press and hold down the left mouse key and move the mouse in any direction.
3 Zoom Rotate the mouse wheel in order to zoom in or zoom out.
Objects
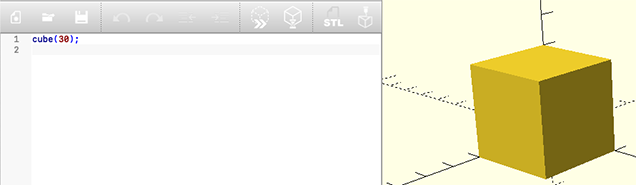
Cube
Let's draw a cube with a 30mm side, " cube(30); " - This way I'm going to use the function cube and define that my cube has an edge value of 30.
Parallelepiped Let's draw a parallelepiped with sides 20,40 and 10mm, " cube([20,40,10]); " - In this way I will use the function cube and define that my cube has specific values for each of the axes (x,y and z = 20,40 and 10 respectively).
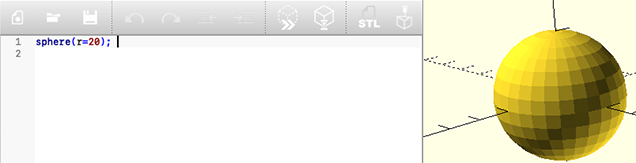
Sphere Let's draw a sphere with a radius of 20mm, " sphere(r=20); " - In this way I will use the function sphere and set the radius r=20mm.
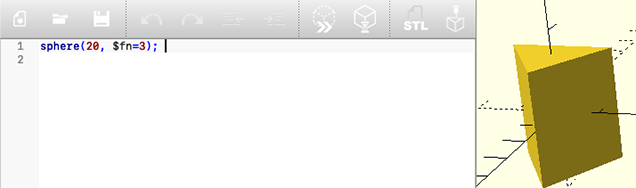
Prism Let's draw a prism, in this case triangular " sphere(20, $fn=3); " - In this way I'm going to use the function sphere along with the $fn=3 command, so I'm inscribing a triangle into a circle.
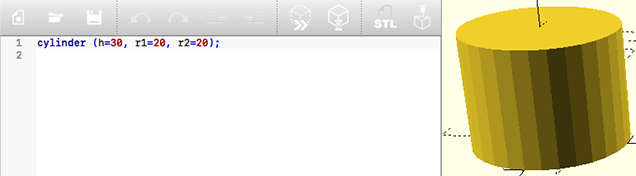
Cylinder Let's draw a cylinder with radius 20mm and height 30mm, " cylinder (h=30, r1=20, r2=20); " - This way I will use the cylinder function and set the height h, and the two radii r1 and r2.
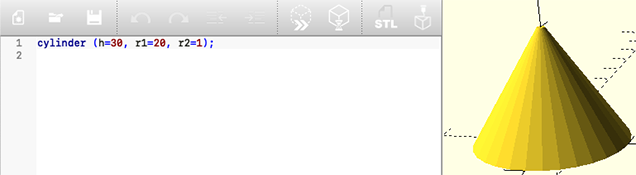
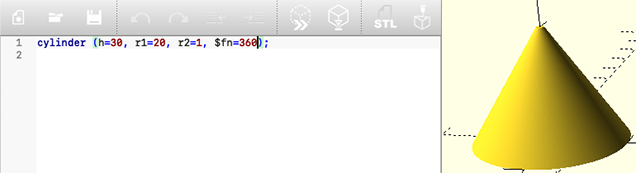
Cone Let's draw a cone with base radius 20mm and top radius 1mm and height 30mm, " cylinder (h=30, r1=20, r2=1); " - This way I will use the cylinder function and set the height h, and the two radii r1 and r2.
Note: As you can see in the images our curved objects do not have a fully curved surface, to get that effect we should use the following command " $fn=360 " so for example on the cone " cylinder (h=30, r1=20, r2=1, $fn=360); " - In this way we have a fully curved surface.
Parallelepiped Let's draw a parallelepiped with sides 20,40 and 10mm, " cube([20,40,10]); " - In this way I will use the function cube and define that my cube has specific values for each of the axes (x,y and z = 20,40 and 10 respectively).
Sphere Let's draw a sphere with a radius of 20mm, " sphere(r=20); " - In this way I will use the function sphere and set the radius r=20mm.
Prism Let's draw a prism, in this case triangular " sphere(20, $fn=3); " - In this way I'm going to use the function sphere along with the $fn=3 command, so I'm inscribing a triangle into a circle.
Cylinder Let's draw a cylinder with radius 20mm and height 30mm, " cylinder (h=30, r1=20, r2=20); " - This way I will use the cylinder function and set the height h, and the two radii r1 and r2.
Cone Let's draw a cone with base radius 20mm and top radius 1mm and height 30mm, " cylinder (h=30, r1=20, r2=1); " - This way I will use the cylinder function and set the height h, and the two radii r1 and r2.
Note: As you can see in the images our curved objects do not have a fully curved surface, to get that effect we should use the following command " $fn=360 " so for example on the cone " cylinder (h=30, r1=20, r2=1, $fn=360); " - In this way we have a fully curved surface.

Rotations and translations
Translation
We can move our object along the x, y and/or z axes, " translate([40,0,0])sphere(20); " - In this way I moved my object along the x axis, 40mm.
Rotation Using the "rotate" function I can define how many degrees the rotation is and on which axis that rotation takes place, in this example I applied a 45 degree rotation on the x and z axis to my object, " rotate([45,0,45])cylinder(h=30, r1=10, r2=10); "
Rotation Using the "rotate" function I can define how many degrees the rotation is and on which axis that rotation takes place, in this example I applied a 45 degree rotation on the x and z axis to my object, " rotate([45,0,45])cylinder(h=30, r1=10, r2=10); "

Union and difference
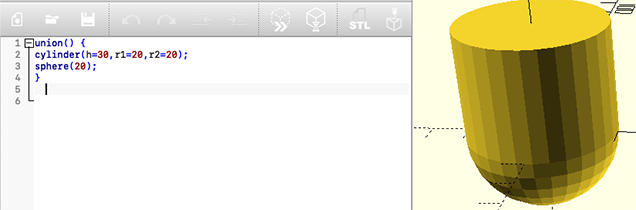
Union
Using the function union I define which objects I want to unite" union() {
cylinder(h=30,r1=20,r2=20);
sphere(20);
} " - In this way I unite the 2 objects.
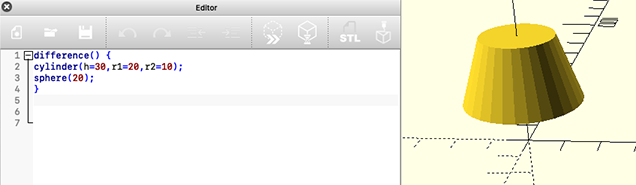
Difference Using the function difference I define which objects I want to subtract" difference() { cylinder(h=30,r1=20,r2=10); sphere(20); } " - In this way I subtracted the 2 objects. But beware, here the order of the objects is important, because if we subtract in reverse order the final object is very different " difference() { sphere(20); cylinder(h=30,r1=20,r2=10); } " Mouse over the image to see.
Difference Using the function difference I define which objects I want to subtract" difference() { cylinder(h=30,r1=20,r2=10); sphere(20); } " - In this way I subtracted the 2 objects. But beware, here the order of the objects is important, because if we subtract in reverse order the final object is very different " difference() { sphere(20); cylinder(h=30,r1=20,r2=10); } " Mouse over the image to see.