Arduino - Workshop
This is a short introduction to the most basic Arduino commands, we will build 4 examples to practice building the connections between the board and the different components and also the first lines of programming.
Don't forget
All arduino sketchs, contain two main blocks of code. The "void setup" and the "void loop".
"void setup" - Here we write the instructions that run only once throughout the program.
"void loop" - Here we write instructions that run in cycles or more than once throughout the program.
The commands end with the ; sign
We define the constants outside of "void setup" and "void loop"
We can add comments with the // symbol and write the text in front of it
The commands end with the ; sign
We define the constants outside of "void setup" and "void loop"
We can add comments with the // symbol and write the text in front of it
Example - Digital Output
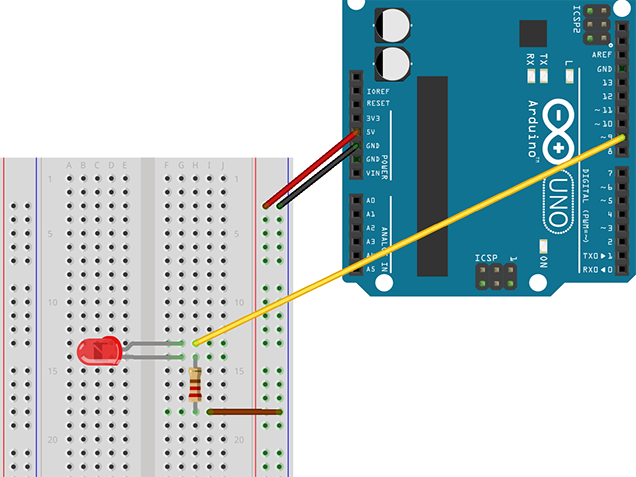
Let's build our first example, a digital output. We will put a blinking led.
Let's first build our electrical circuit so that afterwards we can program the led.
The schematic on the right shows how to connect a led on the arduino board. Now just hover the mouse over the image to access the programming code.
Let's first build our electrical circuit so that afterwards we can program the led.
The schematic on the right shows how to connect a led on the arduino board. Now just hover the mouse over the image to access the programming code.
Example - Digital Input
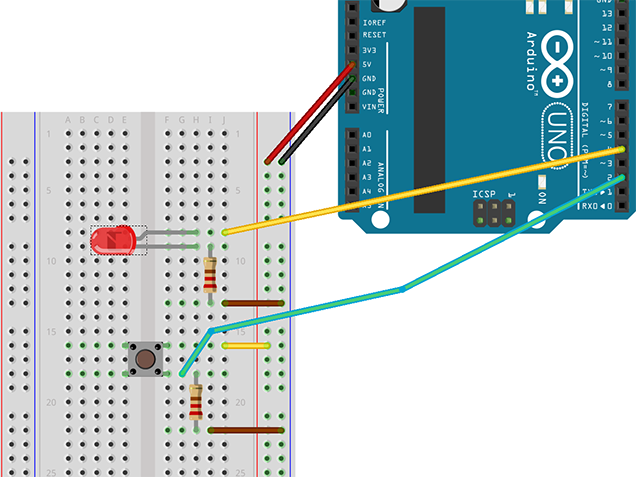
Using the led from the previous example, let's now control the led with a button, let's create a digital input.
The diagram on the right shows how to connect the button to our previous example. Now just hover the mouse over the image to access the programming code.
The diagram on the right shows how to connect the button to our previous example. Now just hover the mouse over the image to access the programming code.
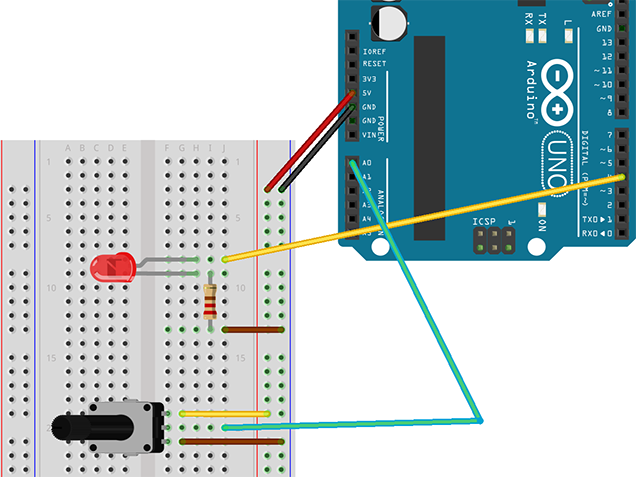
Example - Analog Input
Continuing to use the led, we will now replace the knob with a potentiometer, thus having an analog input.
The schematic on the right side shows how to connect the potentiometer to our previous example. Now just hover the mouse over the image to access the programming code.
The schematic on the right side shows how to connect the potentiometer to our previous example. Now just hover the mouse over the image to access the programming code.
Example - Analog Output
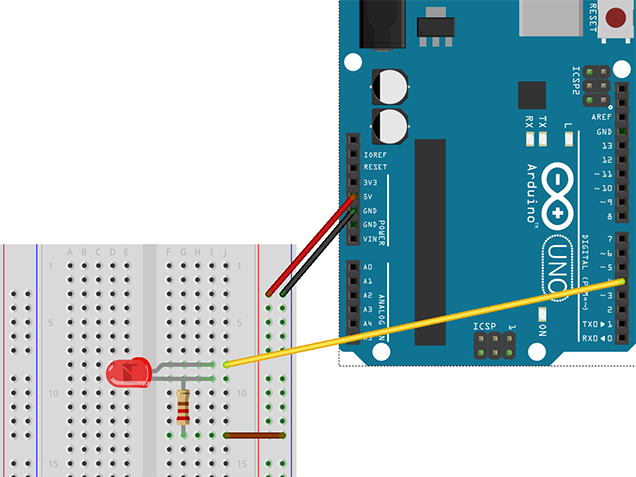
Continuing to use the led, we will now use a PWM port to simulate an analog output.
The schematic on the right shows how to connect the led. Now just hover the mouse over the image to access the programming code.
The schematic on the right shows how to connect the led. Now just hover the mouse over the image to access the programming code.